Life Planner is a powerful tool designed to help you organize your thoughts, track your progress, and achieve your goals through journaling. Whether you're using it on your smartphone or tablet, here's a step-by-step tutorial on how to make the most of its journaling features.

Step 0: Download Life Planner
First, download the Life Planner app from the Google Play Store or Apple App Store. Install it on your device and follow the setup instructions to get started.
Step 1: Open Life Planner Journal Tab
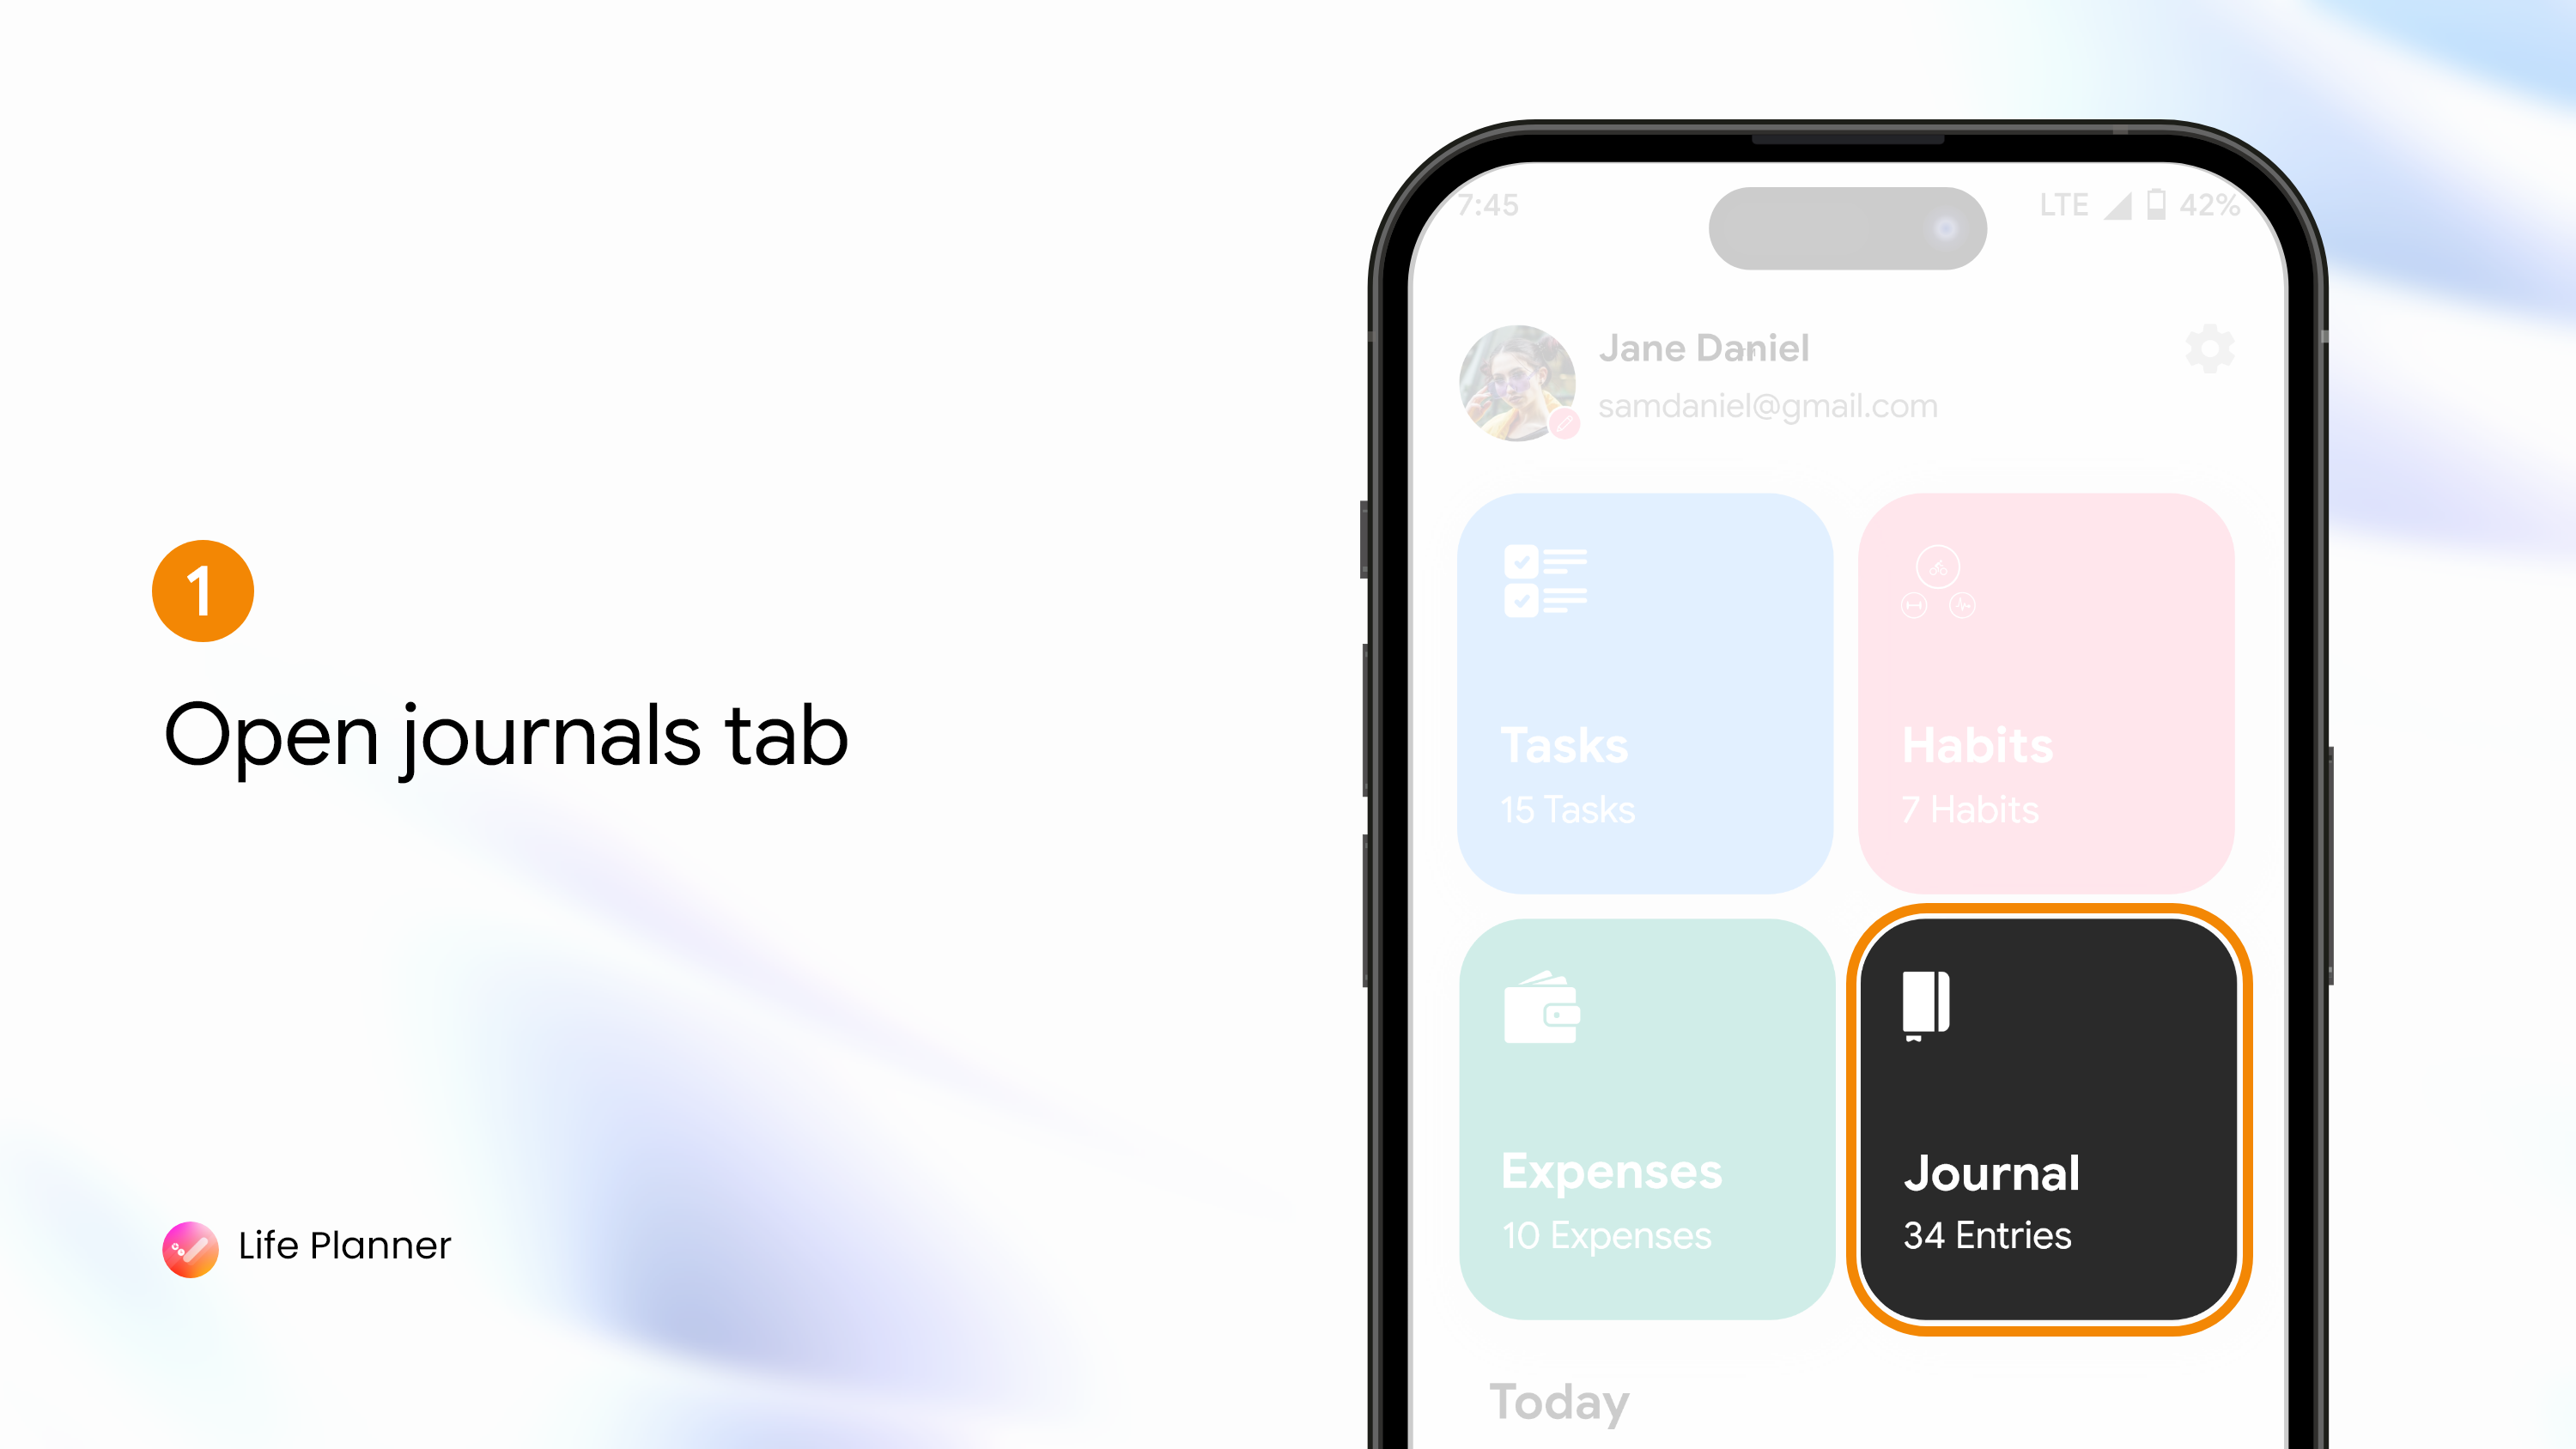
After downloading Life Planner, head to the dashboard and click on the "Journal" tab to start your journaling journey.
Step 2: Tap on Compose to Add a New Journal Entry
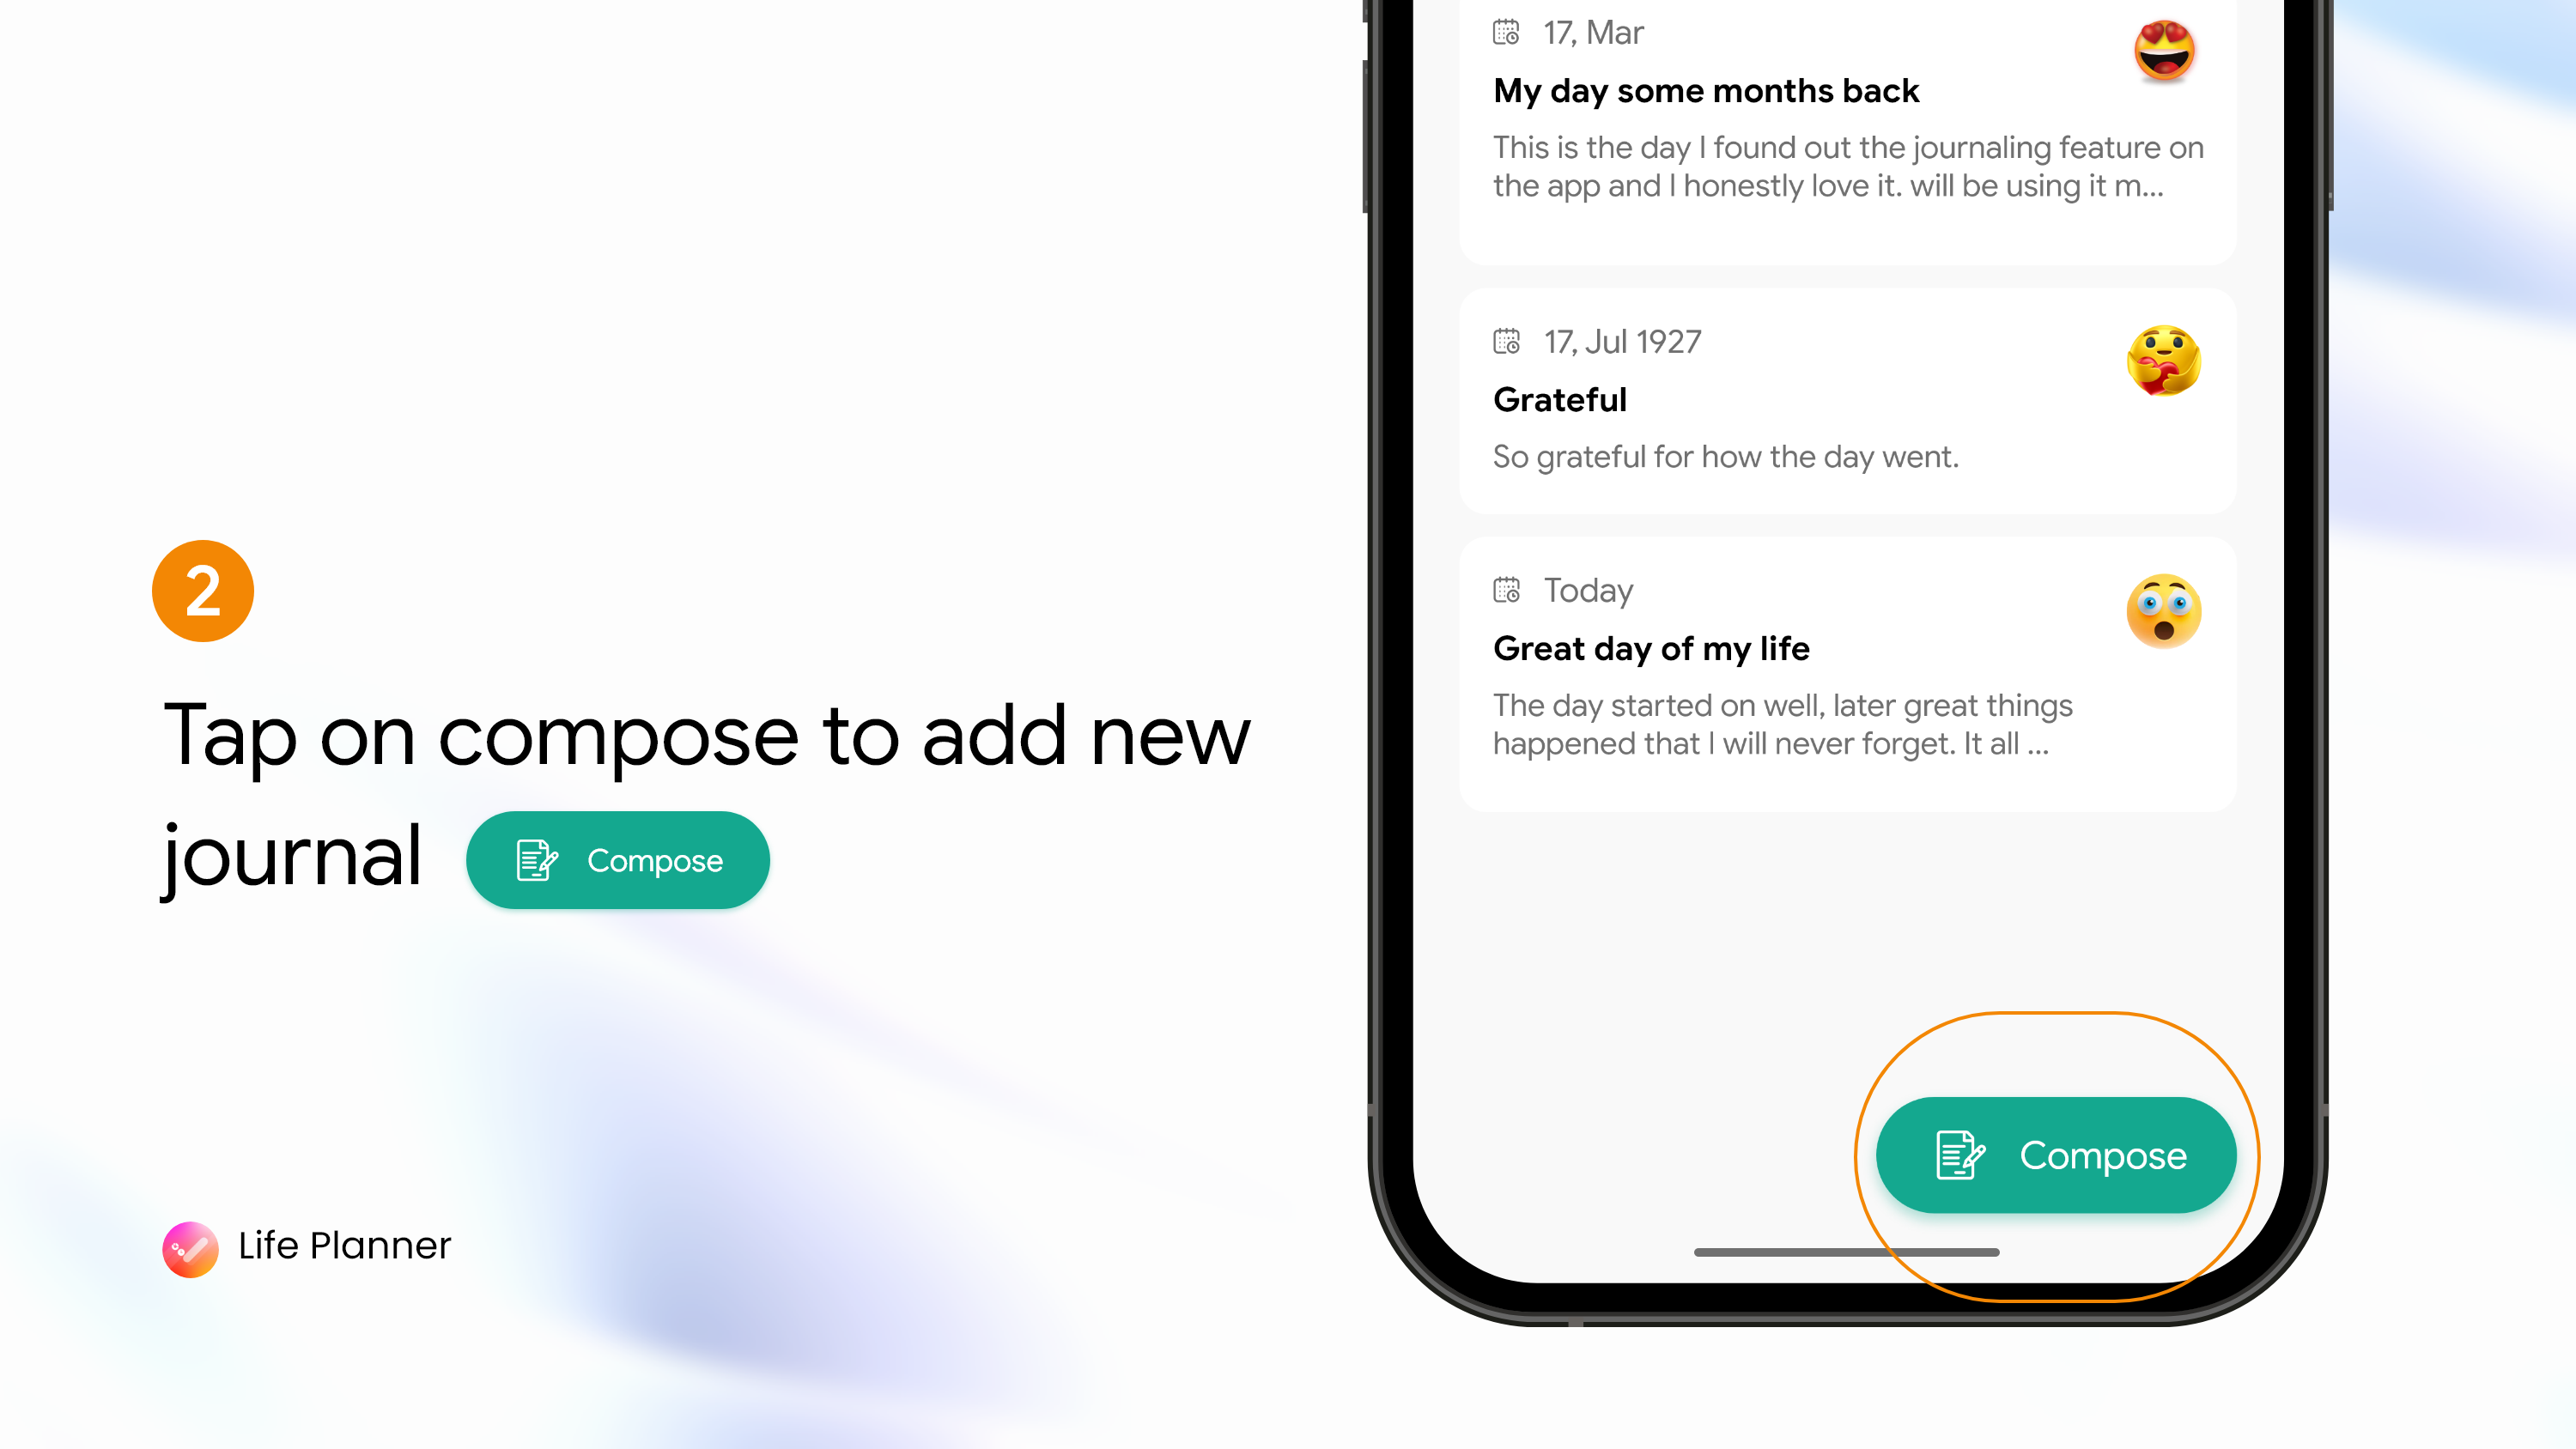
Open the Life Planner app and navigate to the home screen. Tap on the "Compose" button to create a new journal entry. You'll be prompted to choose a title and start writing down your thoughts, expressions, ideas, and more.
Step 3: Write and Save Your Entry
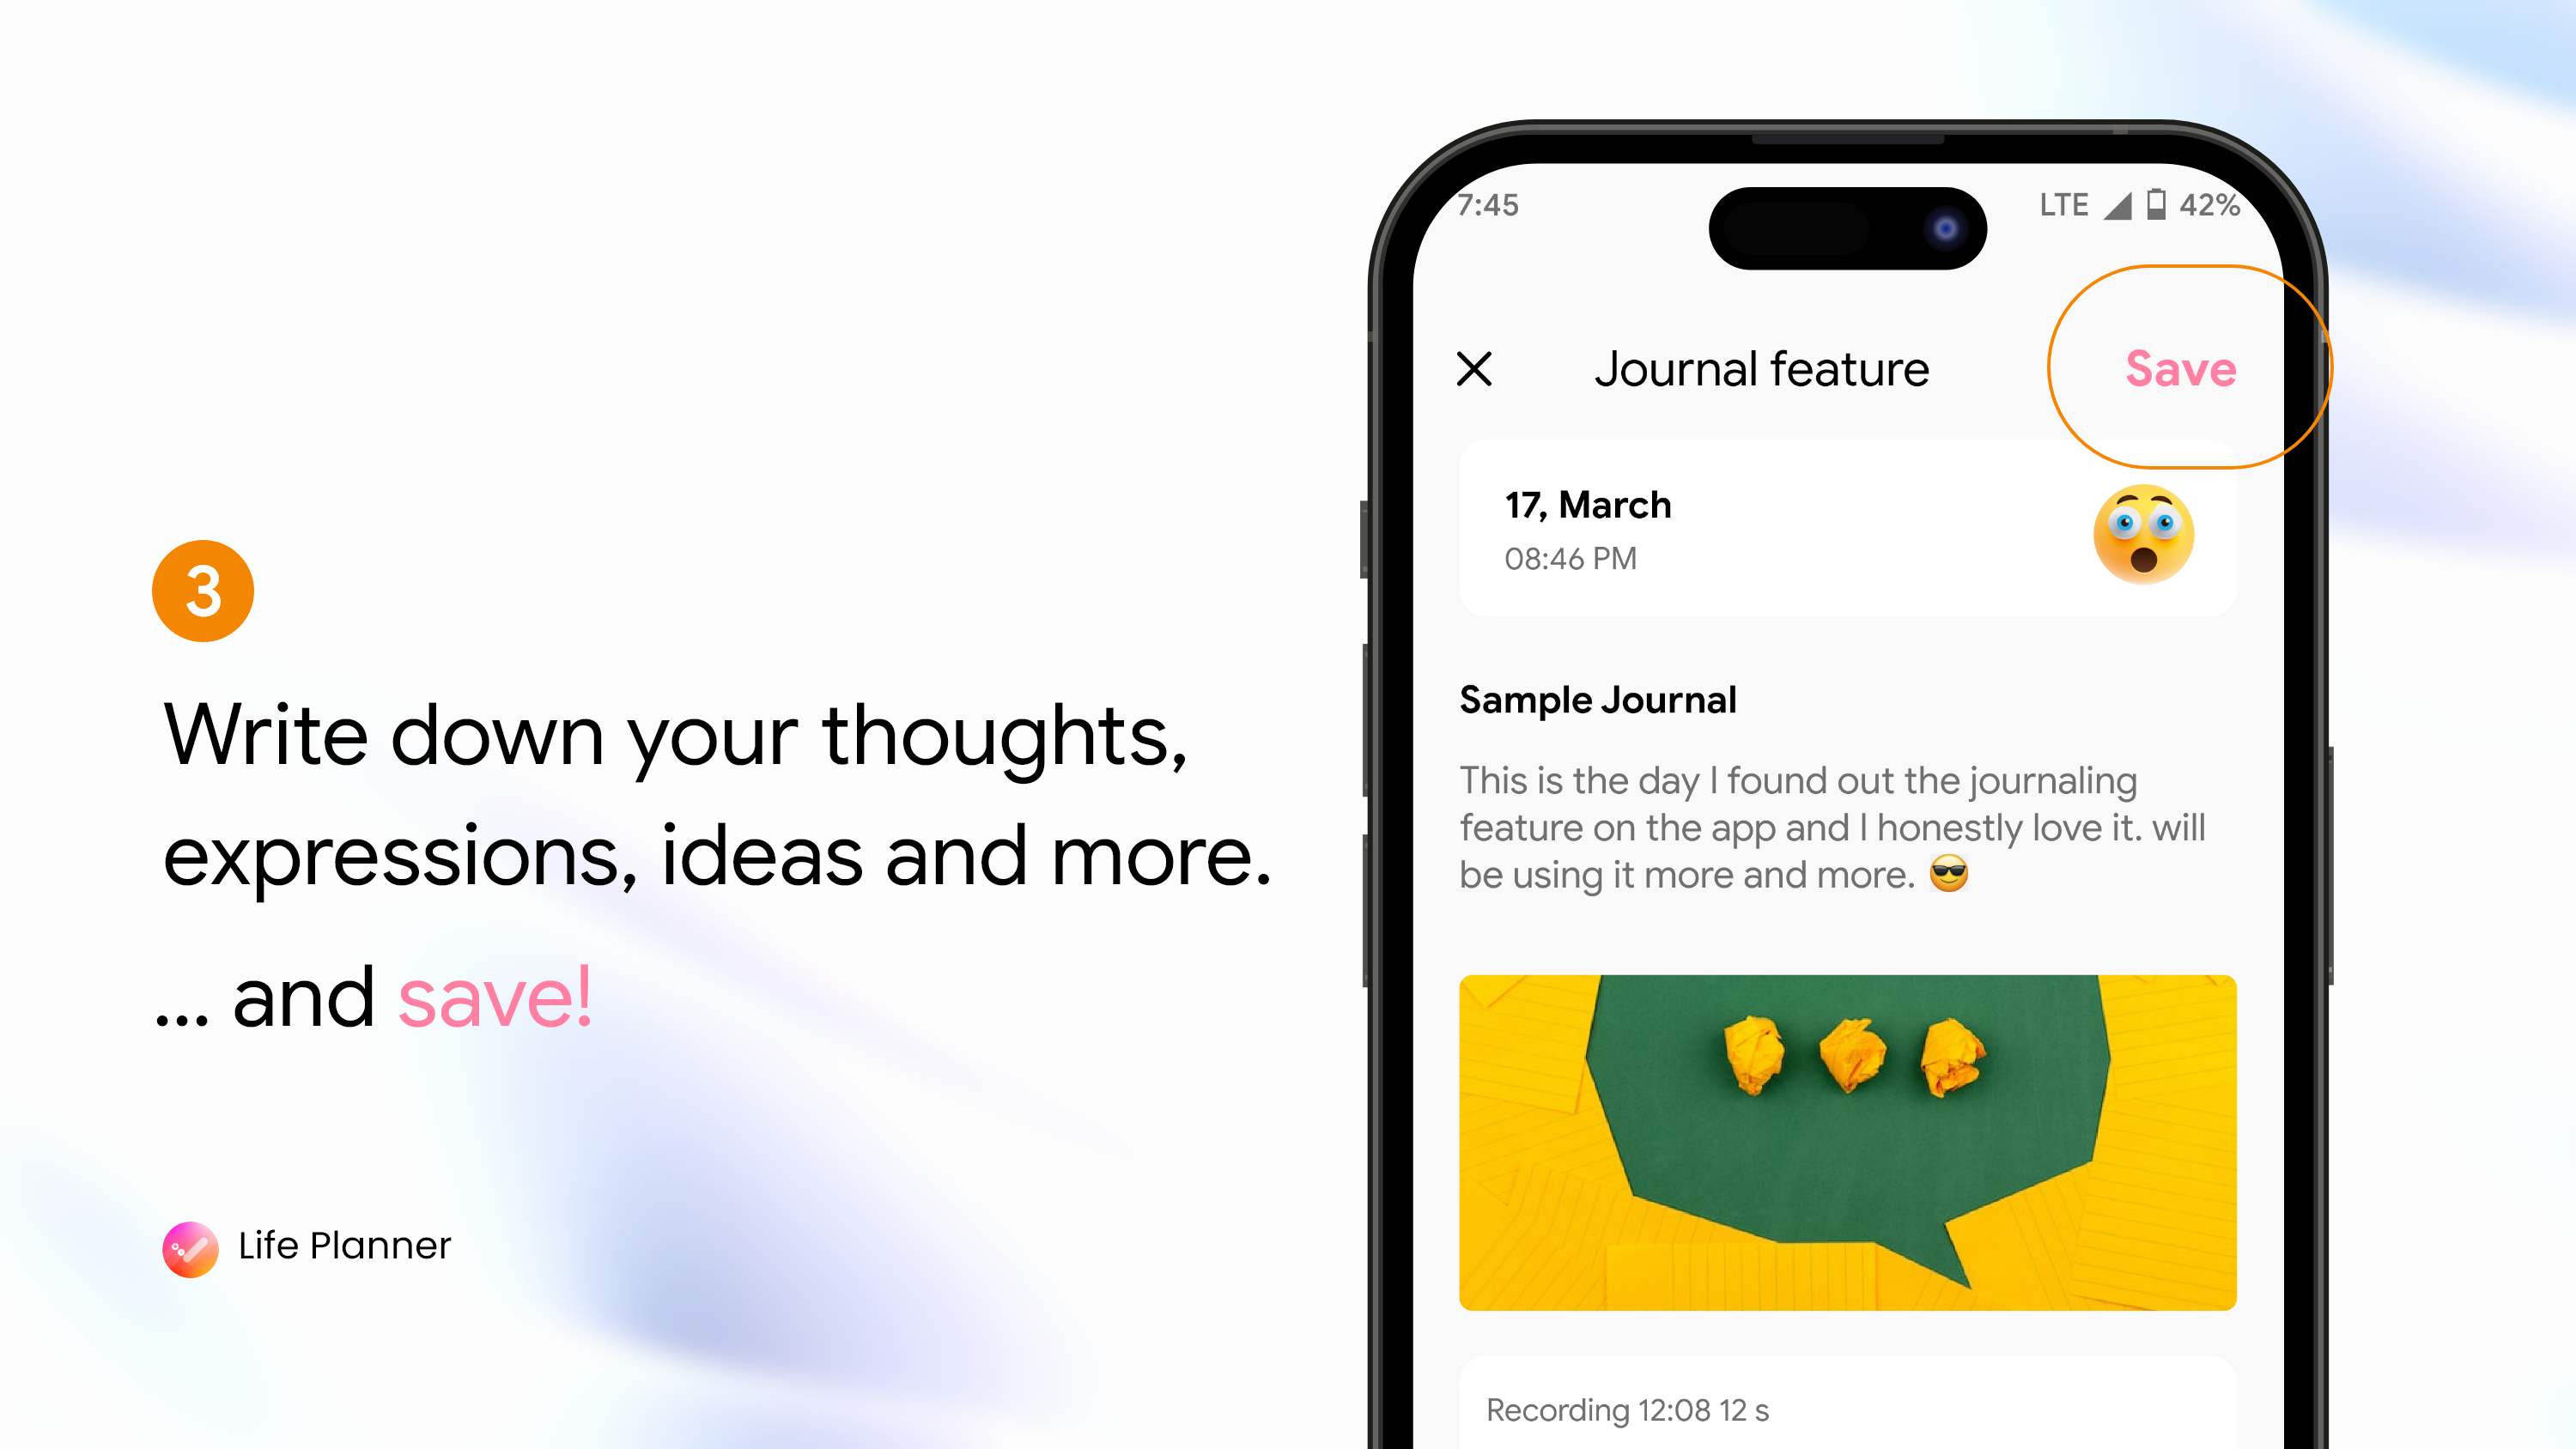
Write down everything you want to capture in your journal. You can use the formatting options provided to customize your text. Once you're done, tap on the "Save" button to store your entry securely within the app.
Step 4: Review and Reflect
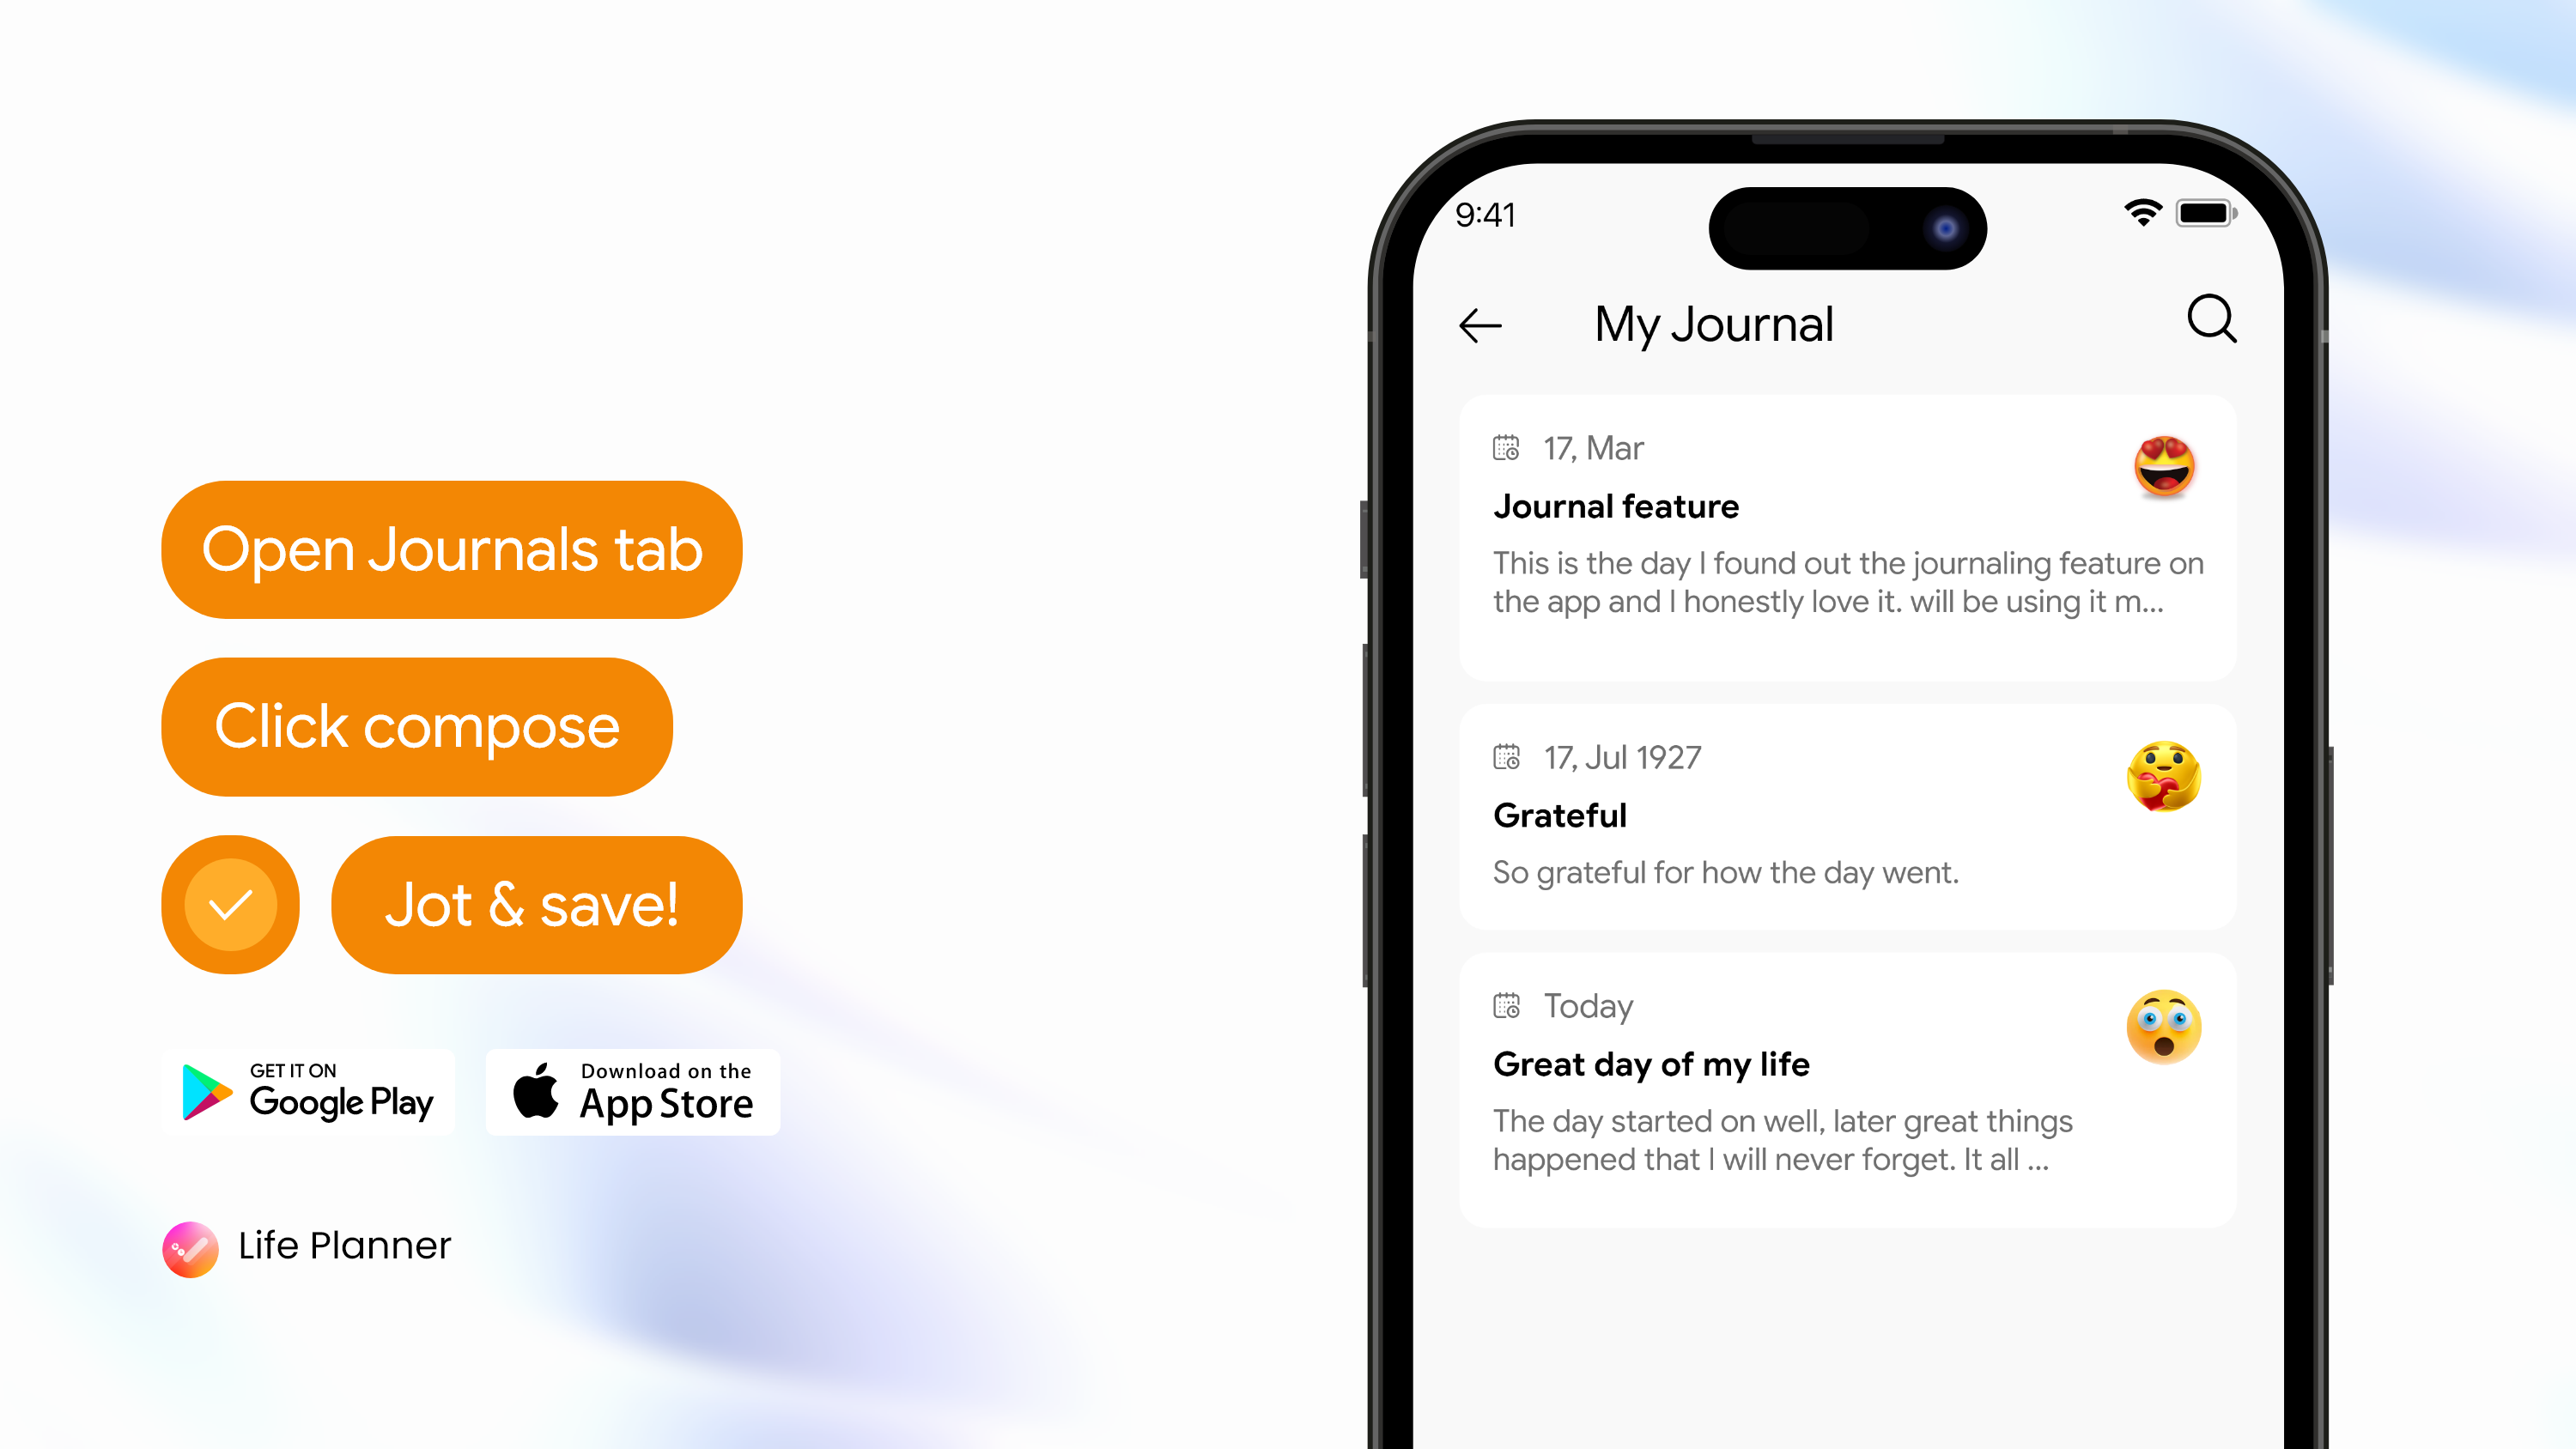
After saving your journal entry, you can revisit it anytime to reflect on your thoughts and experiences. Life Planner allows you to review your past entries easily, helping you track your progress and gain insights over time.
Using Life Planner for journaling is a rewarding way to stay organized, express yourself creatively, and achieve personal growth. By following these simple steps, you can harness the full potential of journaling to enhance your daily life and achieve your goals.